A threaded bottle cap
You will make a 32 mm bottle cap with a thread inside, and an adapter with two threads that screws into it. Then you will change two numbers and watch every thread refit. It takes about 30 minutes, and it is the most advanced tutorial here: do Your first part first if sketching and dimensions are new to you.
Both parts are revolved: you sketch half of a cross-section and spin it round an axis. Threads take a few seconds to compute, so expect a short wait on the thread steps and when you change the parameters at the end.
Open the app at https://app.extrudo.org.
1. Start a design and add your numbers
On the home screen press New design. Press the name at the top, type
Bottle cap and press Enter. Open the Home tab, press Parameters and
add five parameters, each with the unit Length:
| Name | Expression |
|---|---|
capDia |
32 mm |
capHeight |
14 mm |
wall |
2 mm |
adapterLow |
20 mm |
stepHeight |
10 mm |
Under each row you see its value, such as = 10.00 mm. Press Esc to close
the dialog.

2. Sketch the cap's cross-section
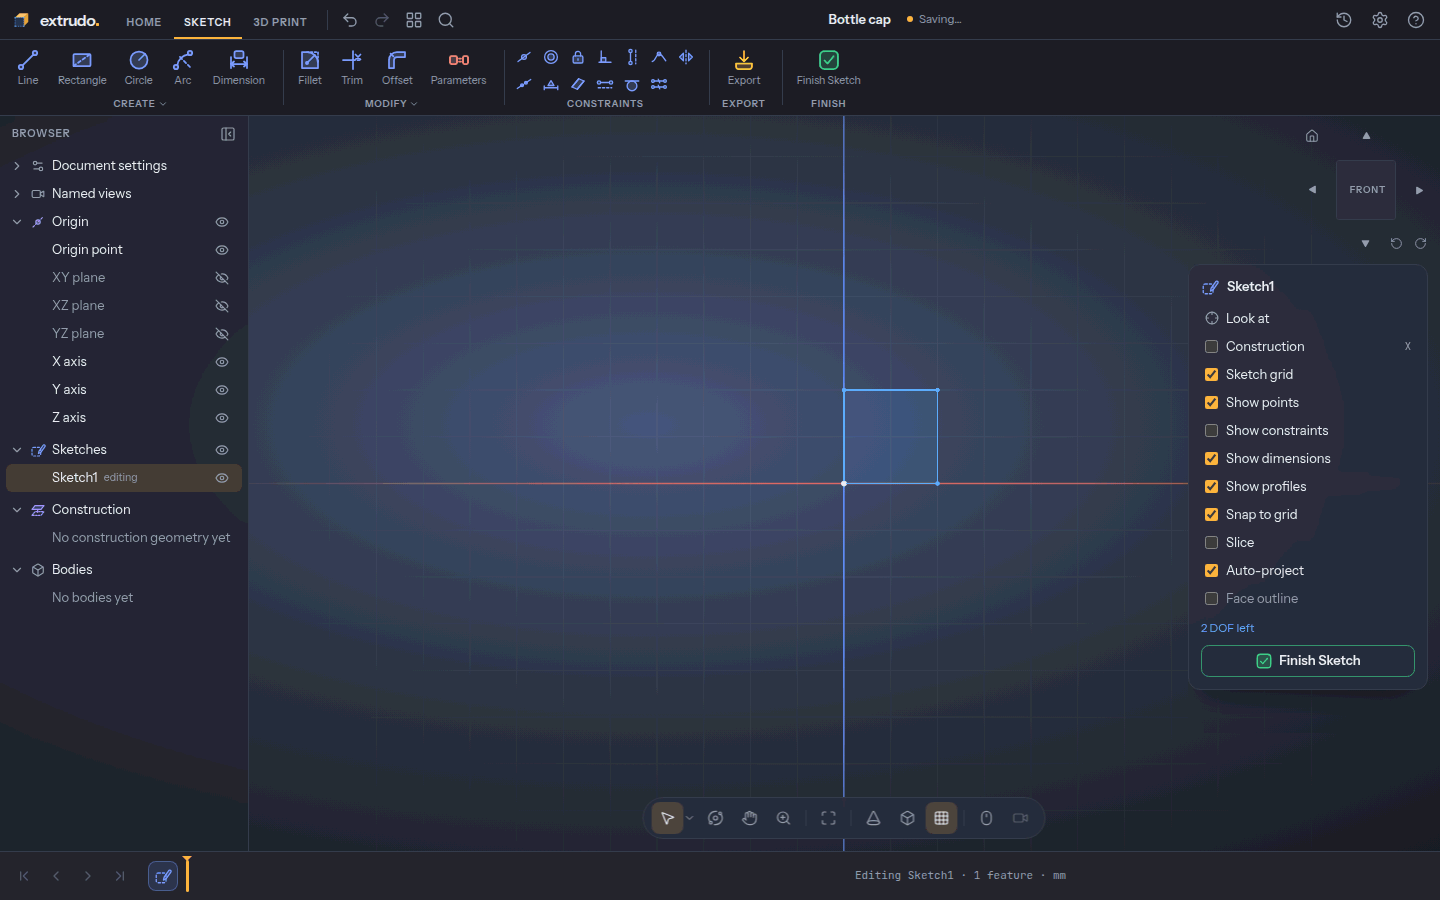
Open the Solid tab, press Create Sketch and choose the XZ plane, the
wall you face from the front. In the Sketch palette switch Show
constraints off. Press Rectangle (or R), click the origin and then click
20 mm across and 20 mm up. Press Esc.
This rectangle is half of the cap seen from the side: its left edge lies on the vertical Z axis, which will be the cap's centre line. The palette says 2 DOF left.
3. Dimension it with your parameters
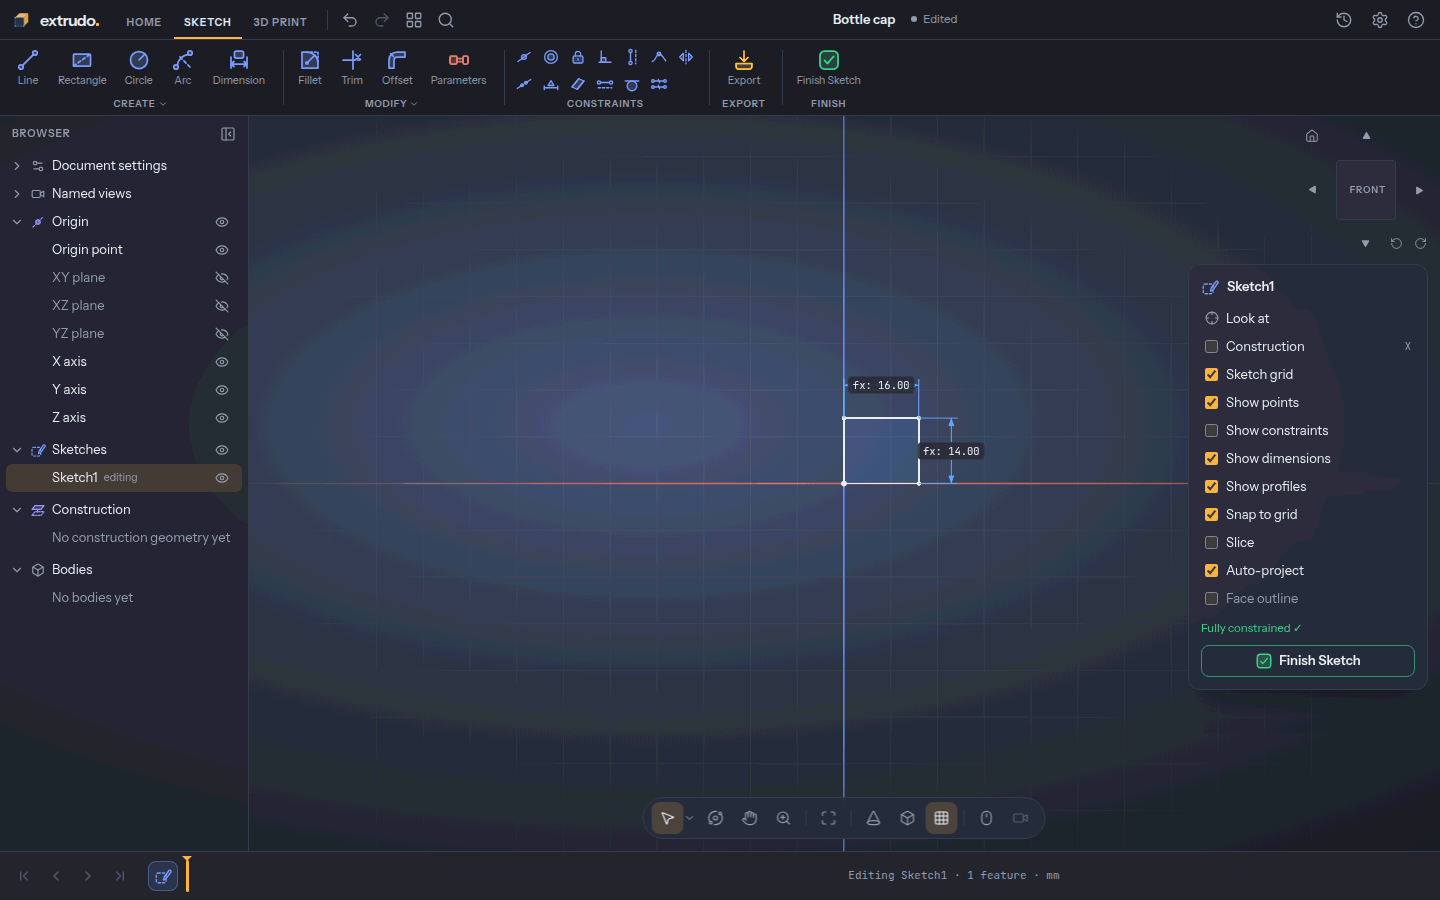
Press Dimension (or D). Click the rectangle's top edge, click above it to
place the label, type capDia / 2 and press Enter. The width is a radius, so
it is half the diameter. Then click the right edge, click to its right, type
capHeight and press Enter. Press Esc.
The rectangle becomes 16 mm wide and 14 mm tall, and the palette reads Fully constrained ✓.
4. Revolve it into a cylinder
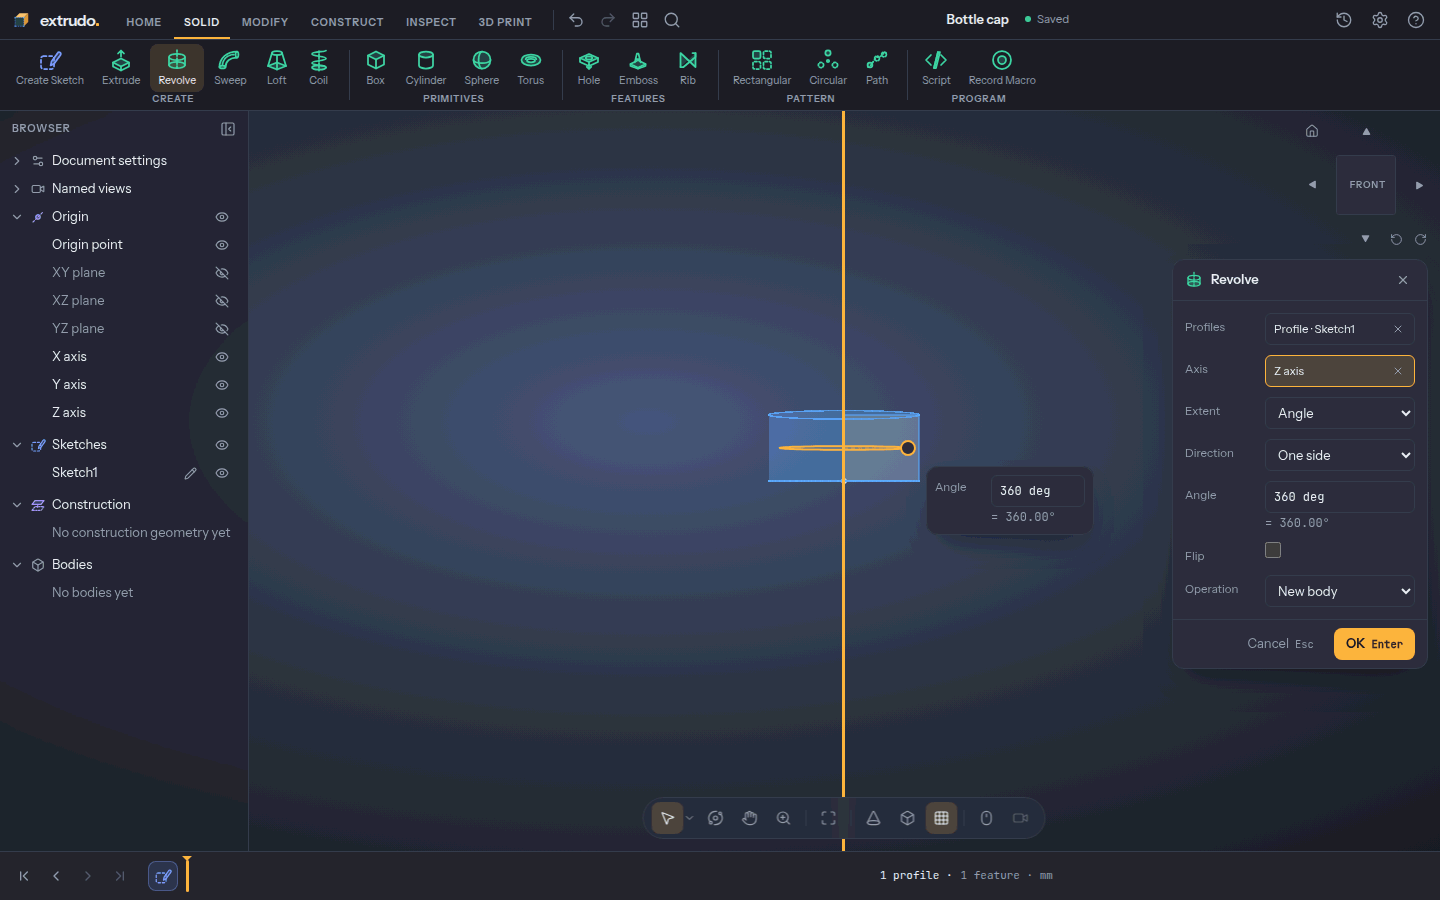
Press Finish Sketch. Click inside the rectangle to select its shape, then open Solid › Revolve. For Axis click the vertical Z axis above the shape; the field reads Z axis. The preview is a whole turn: a solid cylinder, Ø32 mm and 14 mm tall.
5. Press OK and name the body
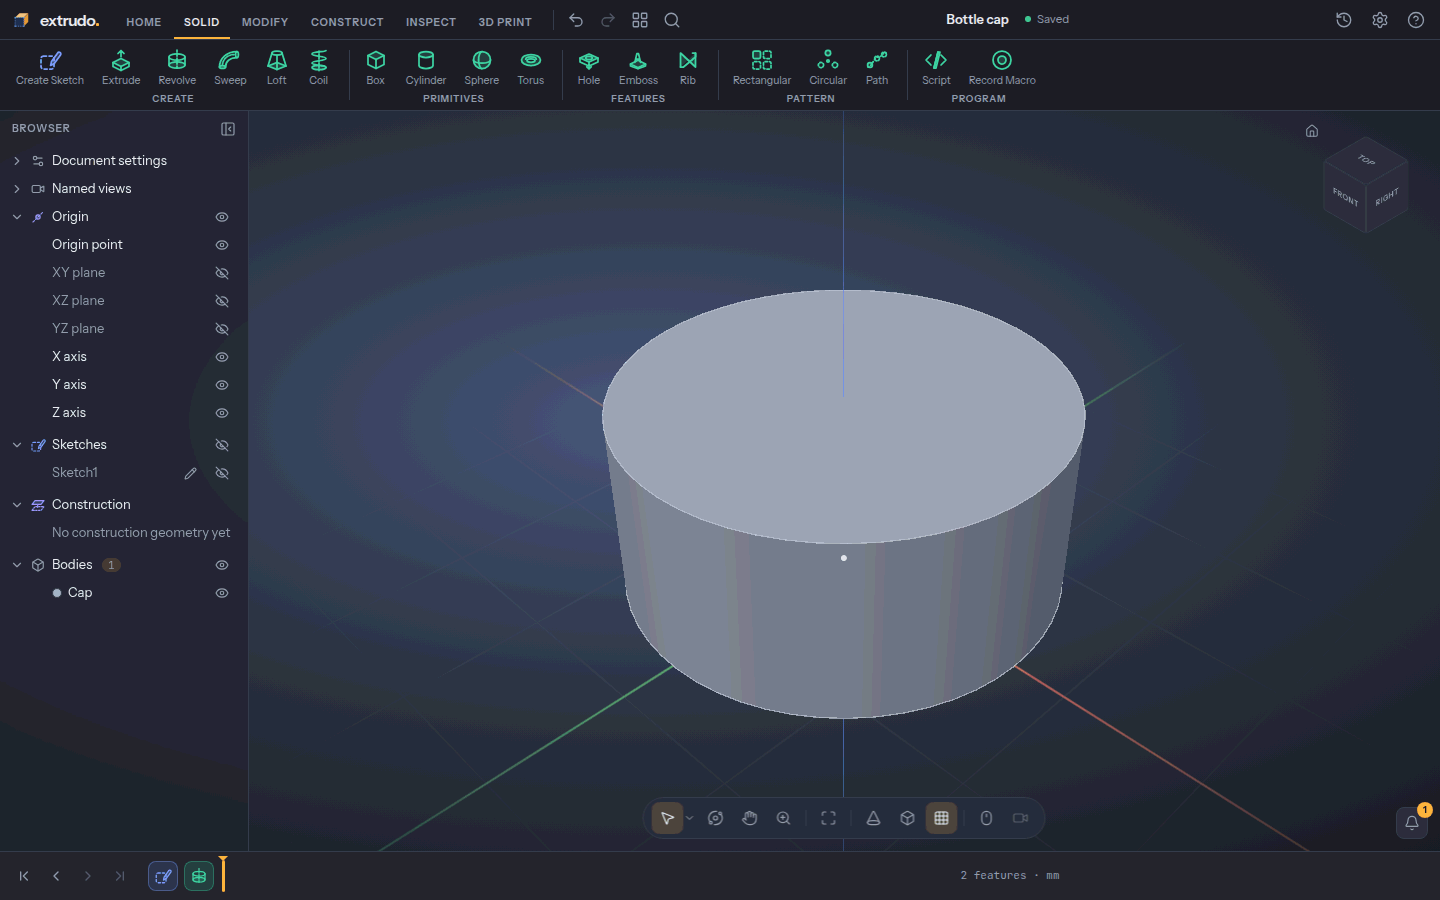
Press OK. The new body appears under Bodies in the browser. Press F2
on it, type Cap and press Enter. Press Shift+1 to look at it from the
front corner. It has three faces: top, bottom and the side.
6. Hollow it out from below
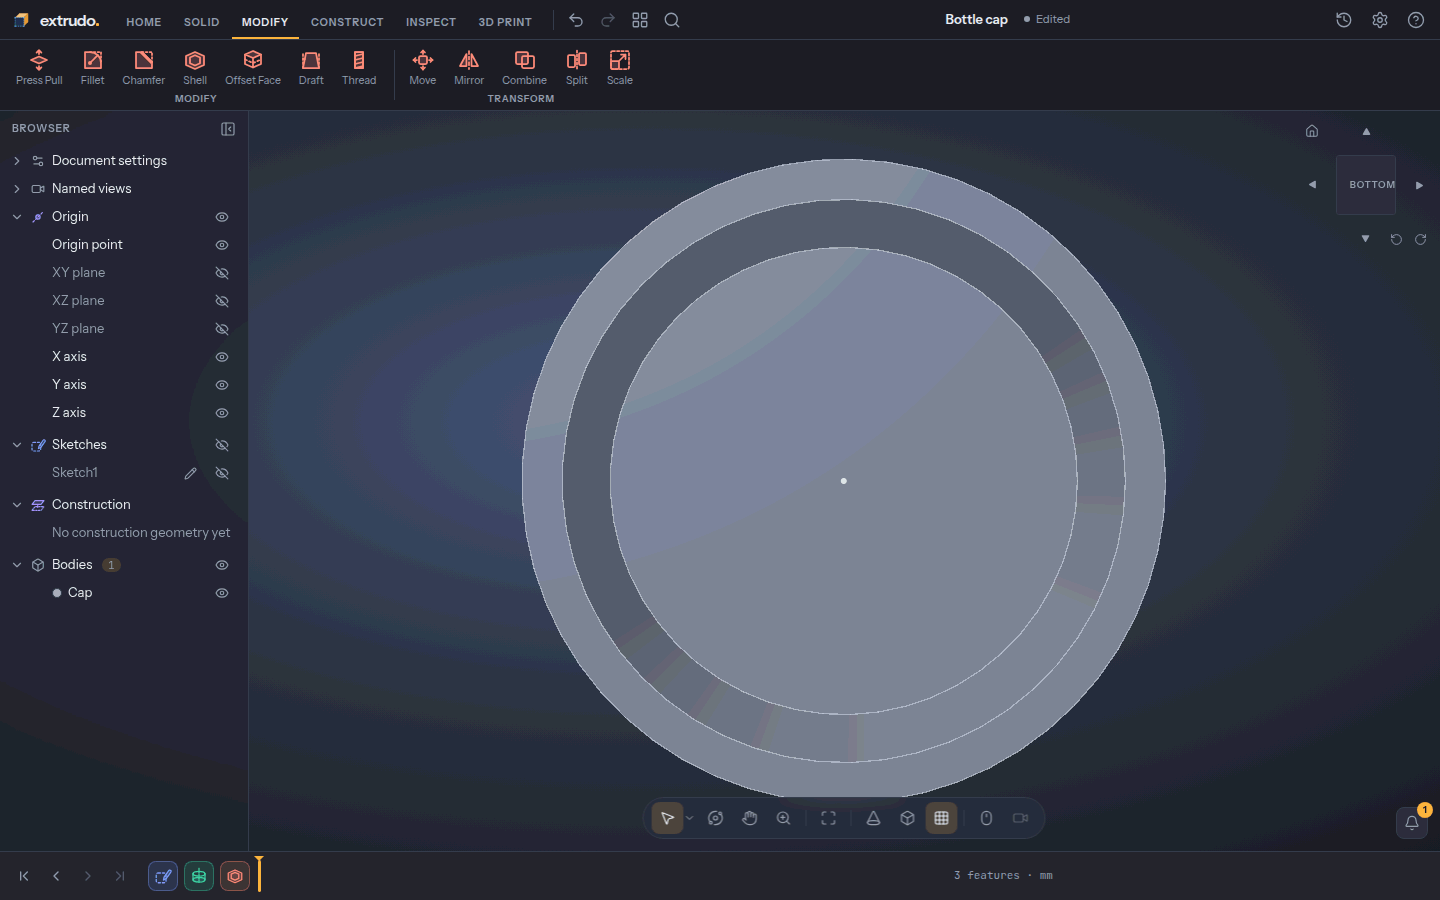
You need to see the bottom: press Shift+3 for the bottom view and click the
cap's bottom face. Open the Modify tab and press Shell. Type wall in
Thickness and press OK.
The cap is now a cup, open below and 2 mm thick all round. It has five faces: outside, top, inside wall, inside top and the rim.
7. Cut a thread inside the cap
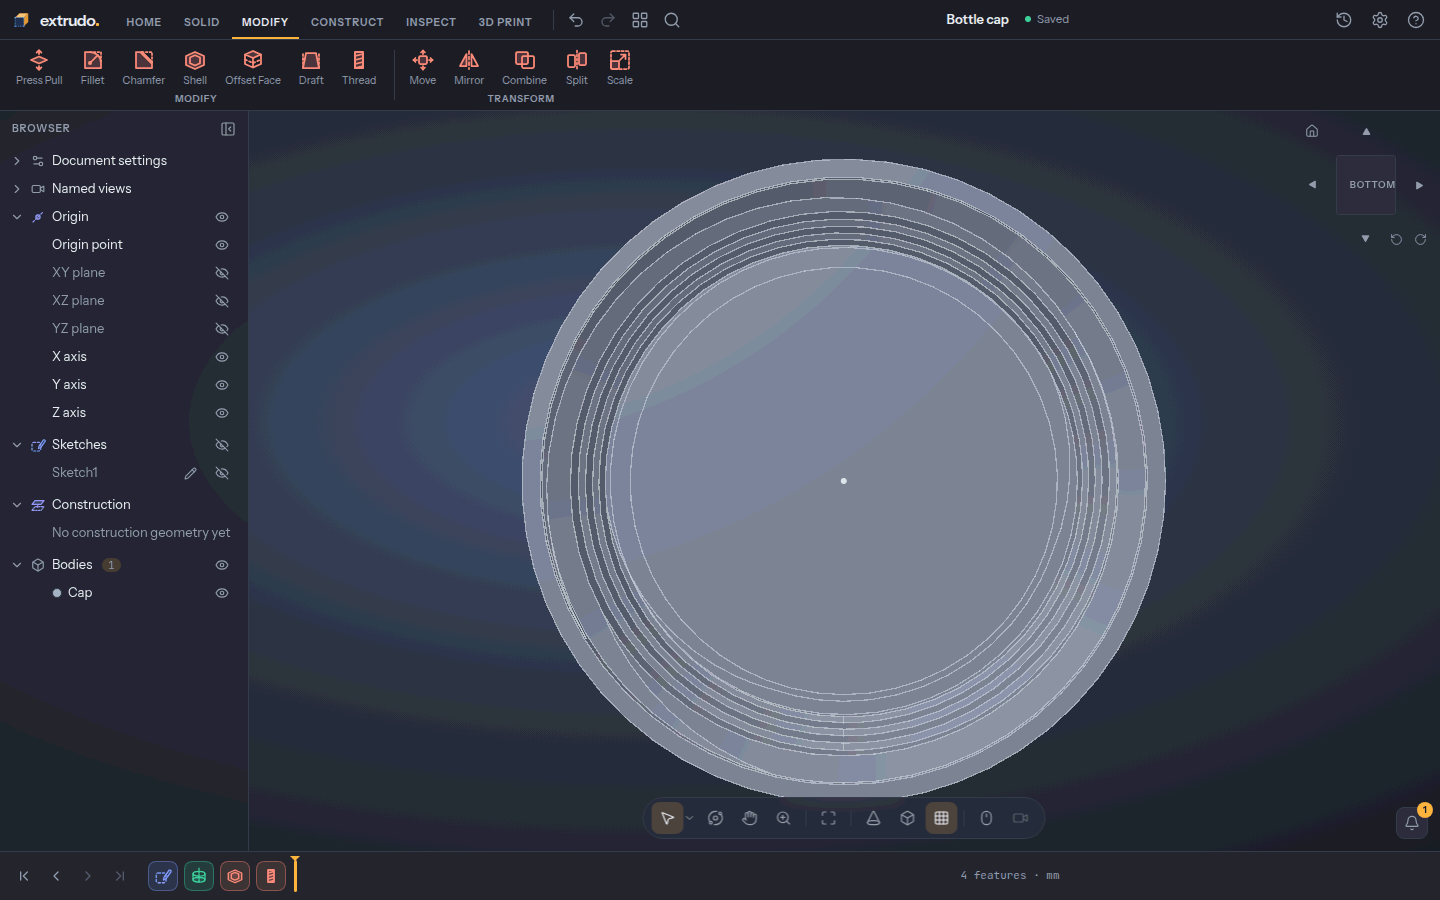
Stay in the bottom view. Click the cup's inside wall, close to the edge: a click in the middle of the hollow picks the flat top instead. Press Thread in the Modify tab. Faces reads 1 face and Size reads auto: Extrudo fits the standard metric thread to the wall's diameter, here M30 in a Ø28 wall.
Wait a few seconds for the preview, then press OK. The inside of the cap gets a spiral groove, and its outside is unchanged at 32 × 32 × 14 mm.
8. Sketch the adapter below the cap
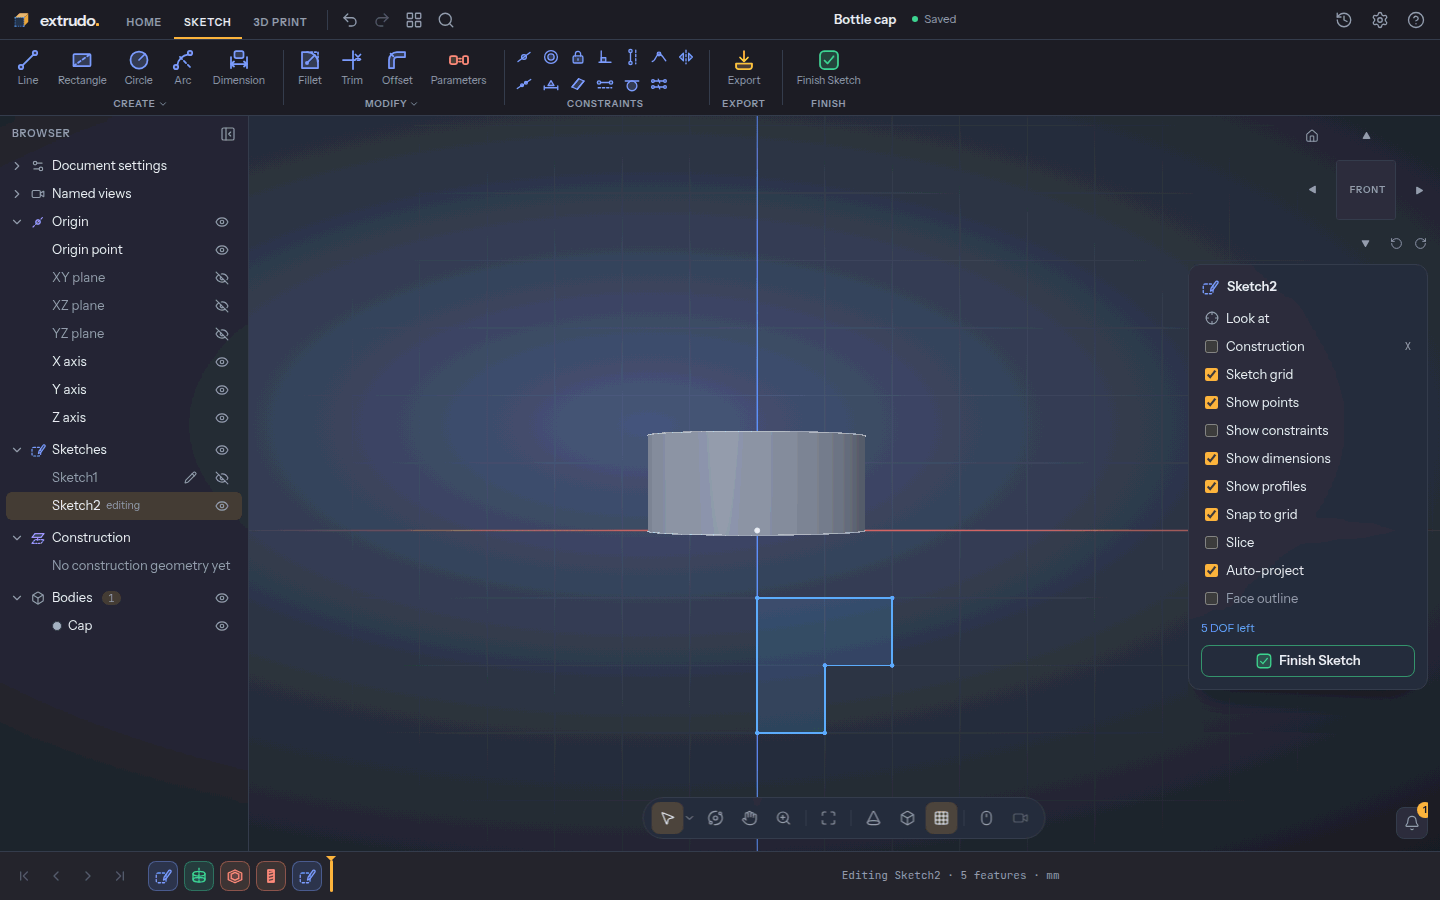
Open the Solid tab, press Create Sketch and choose XZ again. The adapter reaches 30 mm below the cap, so scroll out until z = −30 mm is on screen, and switch Show constraints off.
Press Point and click the origin: that pins the sketch's top. Press Line
(or L) and click these points in turn: (0, −30), (10, −30), (10, −20),
(20, −20), (20, −10), (0, −10) and back to (0, −30). Press Esc twice.
You drew a stepped half-section: a narrow bottom and a wider collar above it. The palette says 5 DOF left.
9. Dimension the adapter
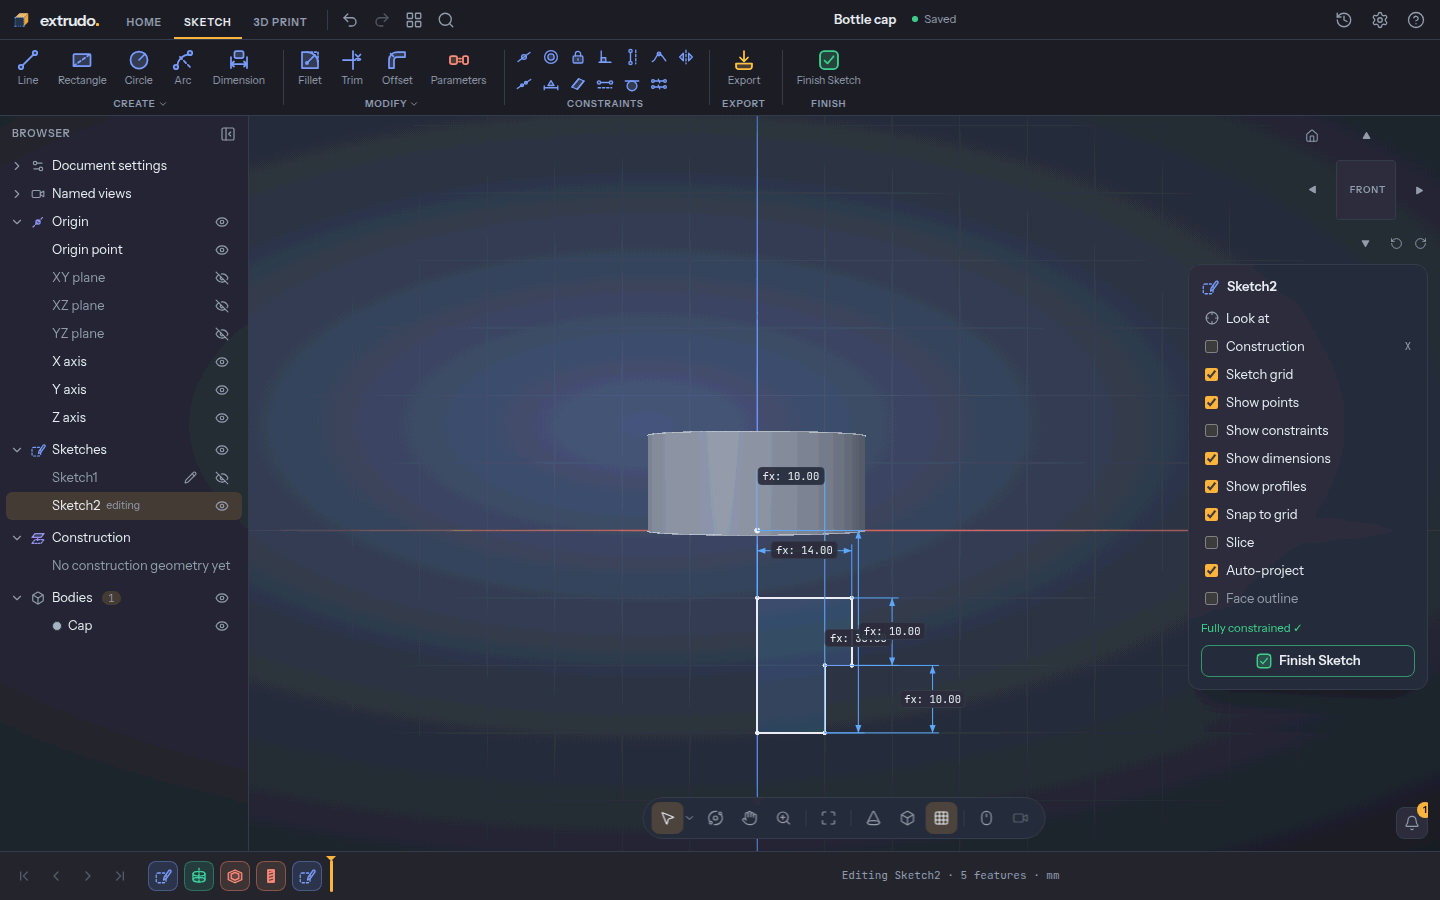
Press Dimension (or D) and add five dimensions. Each one is: pick, place the
label, type, Enter.
- The origin and the bottom-right corner (10, −30), label to the right:
3 * stepHeight. - The same two points, label above:
adapterLow / 2. - The first step's vertical side, label to the right:
stepHeight. - The second step's vertical side, label to the right:
stepHeight. - The top edge, label above:
capDia / 2 - wall. That is the same width as the cap's inside, so the adapter will meet it.
Press Esc. The palette reads Fully constrained ✓. A sixth dimension would
over-constrain it.
10. Revolve the adapter as a second body
Press Finish Sketch. Click inside the lower step to select its shape and open
Revolve. Set Operation to New body so it does not join the cap. Click
the Z axis below the shape, press OK, and rename the new body Adapter.
Under Bodies you now have Cap and Adapter. The adapter is Ø28 mm and 20 mm
tall with five faces.
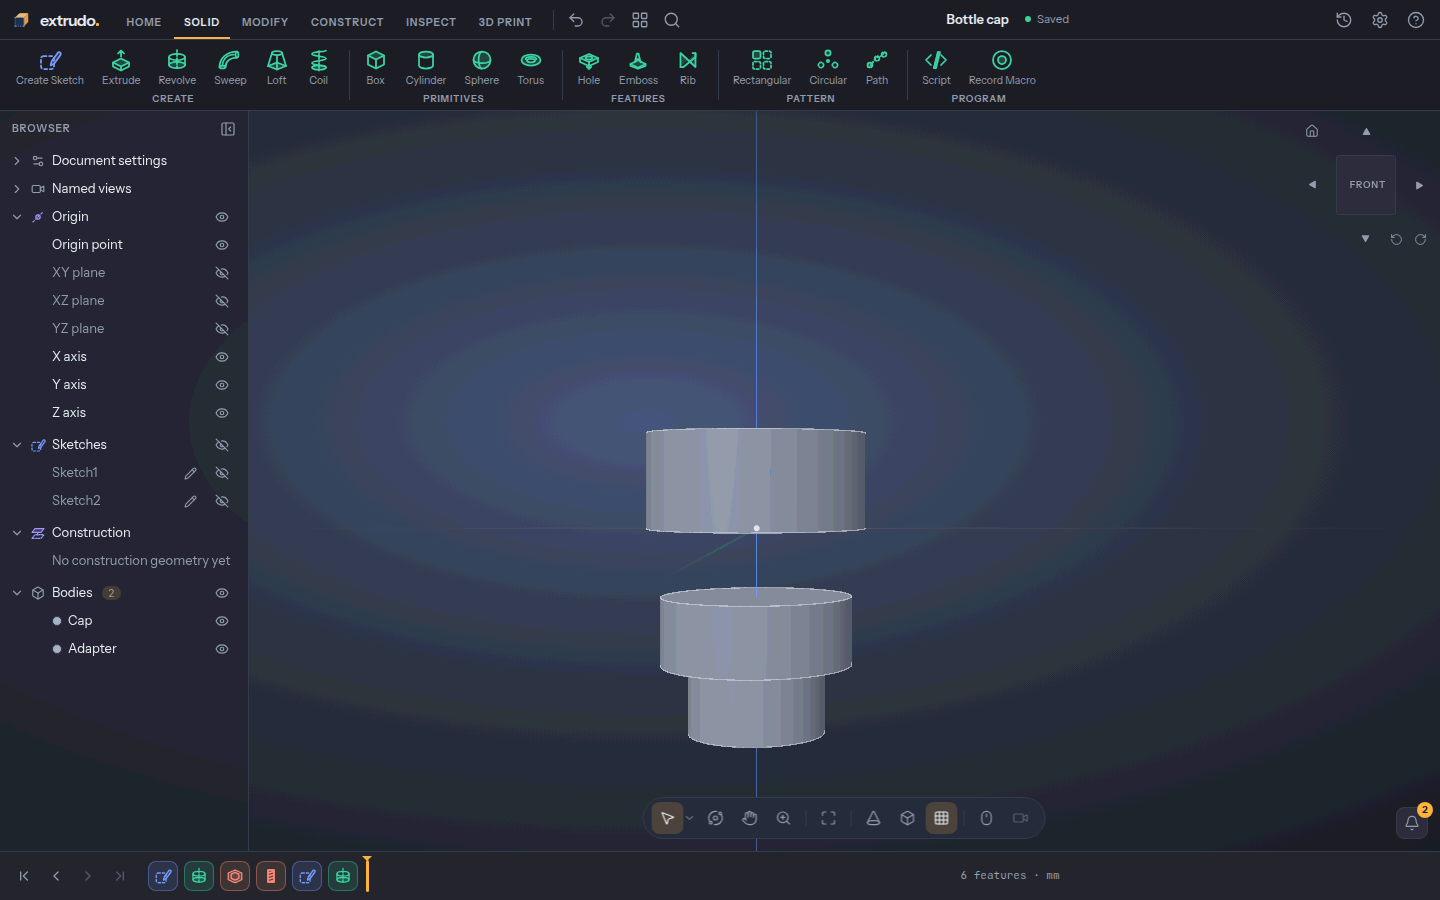
11. Thread both steps of the adapter
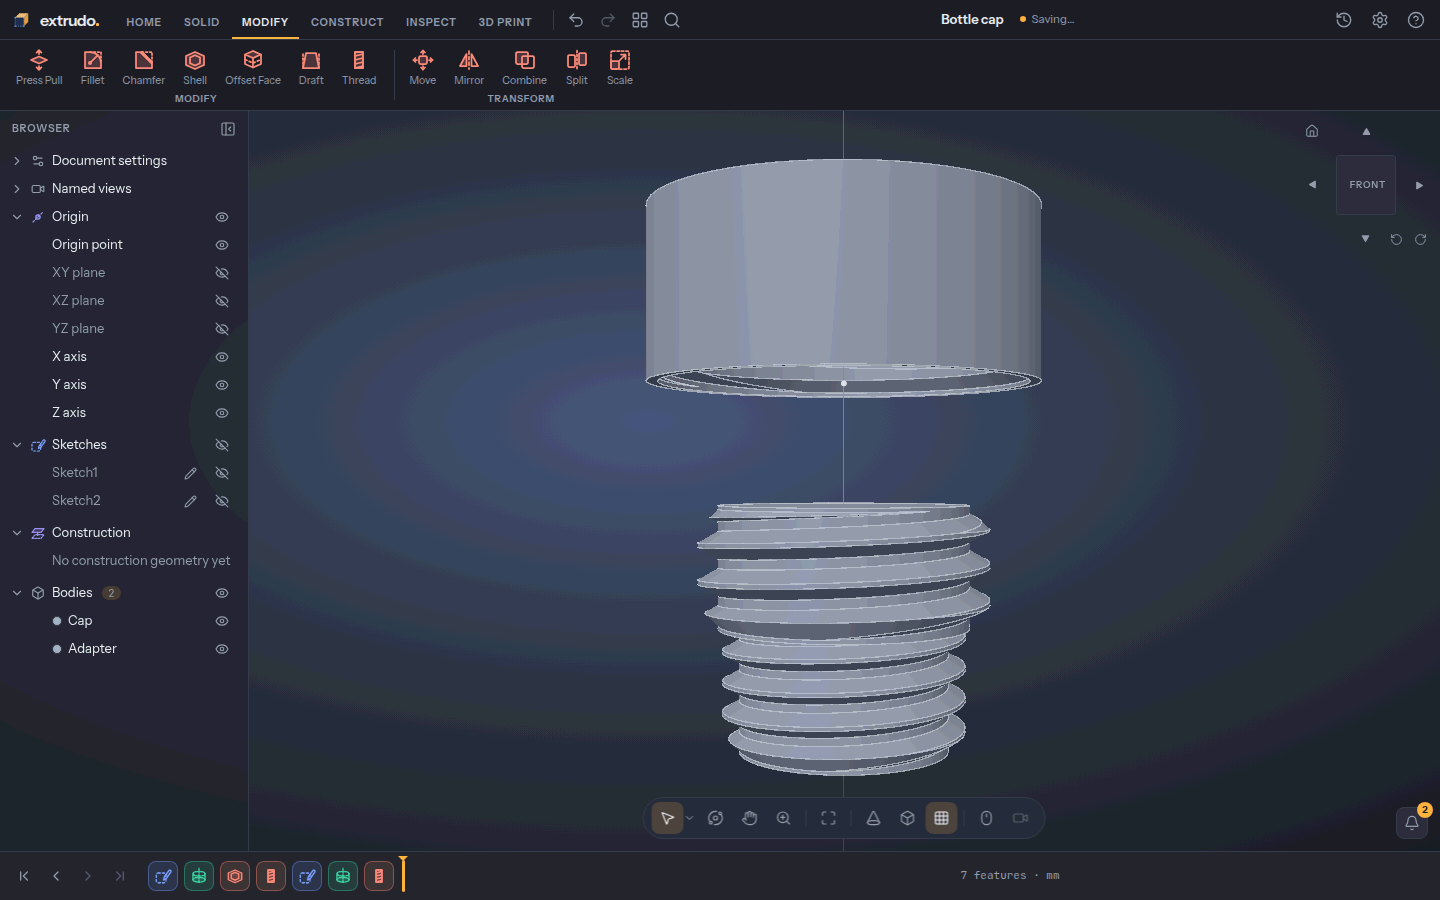
Press Shift+4 for the front view. Click the narrow step, open Modify ›
Thread, then click the wide step as well: Faces reads 2 faces. Leave
Size on auto and wait for the preview. Press OK.
Each step gets the thread that fits it, M20 on the narrow one and M24 on the wide one. A thread turns the step down to its crests, so the adapter ends up Ø23.8 mm; the cap is unchanged.
12. Change two numbers
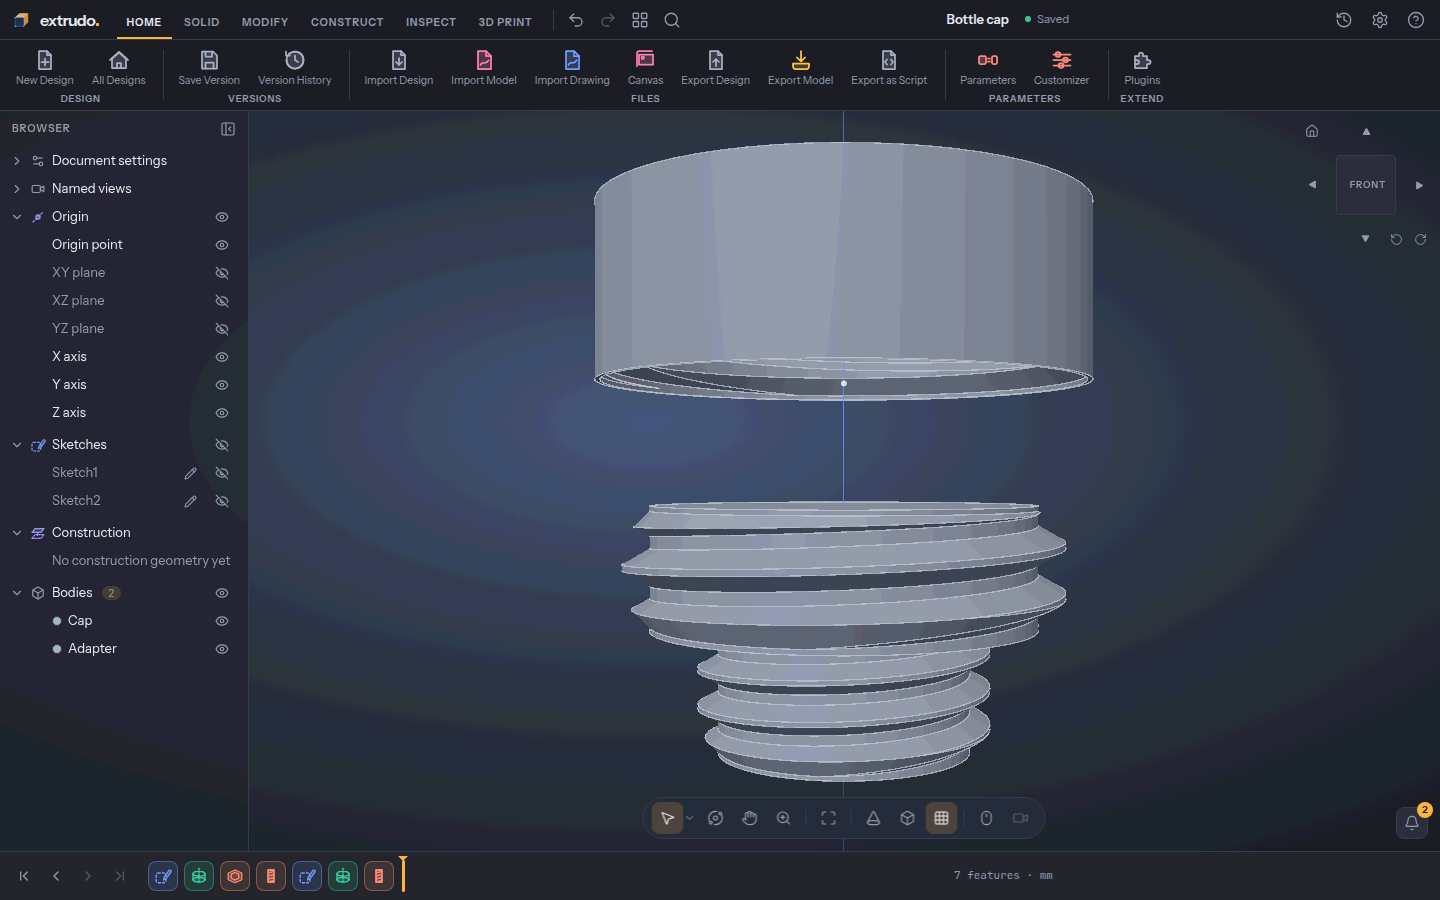
Open the Home tab, press Parameters and set capDia to 40 mm and
adapterLow to 24 mm. Press Esc and wait while the threads are rebuilt.
Both sketches follow the parameters and every thread refits: the cap is now
40 mm across, and the adapter 35.8 mm. The bigger cap bore takes an M39 thread and
the wider adapter collar an M36, so the two parts still mesh. If you do not like
it, Ctrl+Z undoes the change.
What you learned
- Revolve spins a sketched half-section about an axis, which suits caps, knobs and anything round. A second Revolve with New body makes a part of its own.
- Shell hollows a body and opens the face you pick.
- Thread with Size on auto fits a standard thread to any round wall, inside or out, and refits when the wall changes.
- Parameters reach through sketches, solids and threads, so one edit resizes the whole design.
Related tools: Rectangle, Line, Dimension, Revolve, Shell, Thread and Parameters. The guide pages Sketching, Features and the timeline and Parameters go deeper.